Toast Painting


By now it is no secret Kaitlyn loves anything to do with art. This has made me think back to my time working with preschool age children. I am so thankful I worked with wonderful teacher who had such amazing ideas. This is one of our favorites.

What you need:
  • Toaster /toaster oven
  • Bread
  • Milk
  • Food coloring
  • Cups ( I used sauce cups)
  • Food safe paint brushes ( you can find cheap ones in the cake décor section at Wal-Mart, Michael’s , Hobby Lobby, etc)

The process:
  1. Add a little bit of milk into as many sauce cups as you want. We had four sauce cups so we made four colors: Red, Blue, Yellow, and green
  2. Mix in food coloring until you reach the desired color
  3. Take your bread and paint brush and start painting. Make sure not to add too much liquid to the bread, just enough to color it
  4. Once your masterpiece is done put it in the toaster and then add butter, if you wish, and enjoy!

MommyCon Anaheim 2015

My MC loot, I did but some of the cloth diapers, the silikids lids, and a swaddler
pretty much everything else came with the VIP or General Admission (I had 2 tickets)

This was the year I had ever heard of MommyCon and  the first year that I attended. Like many of you, I didn’t know exactly what to expect nor did I know if it would be worth it. I just want to go and see. I searched the internet for more info and I wanted to know of the experience of others. I found a lot really great experiences and a lot of negative experiences. I thought I would add my experience to the bunch.

First off  WHAT IS MOMMYCON?
Well, it is a convention centered on parenting, babies, baby gear, and parent support. It mainly focuses on the more natural / organic side of parenting, BUT no one is preachy on this subject. They advocate for it, but also don’t shame parents for doing things differently. (more on that later) Vendors from many different types of products such as breastpumps (evenflo, ameda), swaddle suits, teething products, all natural baby and home care products, car seats, etc. You name it, they have a vendor or a booth that has it. 
There are also different seminars you can attend I will post the schedule so you can see what types of informational seminars there were.
You meet really neat and some really odd parents…HA! I was probably the weirdo.
There are VIP or sessions you have to pay extra for but also get these amazing goody bags from.

VIP Sessions
These sessions were not exactly what I was hoping for…expecting...I thought I would learn about a particular subject but ended up being a little different….Here is a break down, session by session. All sessions had a snack bar....


Cottonbabies with Jennifer Labit 
She took the time to listen to our questions and answer them
 MY FAVORITE. 

I thought I would learn about the ins and outs of cloth diapering, but it ended up being a session geared towards empowering women and answering questions about how to start, continue, and manage a business. When I walked in and Jenn started asking for business related questions, I thought to myself “Great….not what I wanted.” It ended up being exactly what I needed. Jenn talked about her struggles as a mother, deciding between buying diapers and feeding her family, her experience with post par-tum depression, her not so perfect messy home. She was REAL. She said something that hit so close to home. “Don’t let perfection be the expectation” I walked out of there feeling like I could conquer the world and that it was ok to ask for help.
After the session Jenn and I had a little conversation. Now, she doesn’t know me and didn’t know the struggles I was facing, but she hugged me and looked me in the eye and said, “take care of yourself, really, Take care of yourself.” Then we continued talking. I needed to hear that…
Cost: $40
Goodie Bag:
Awesome canvas tote, Bumgenious Cloth diaper, wet bag, and bum cleaner, and lot's more….


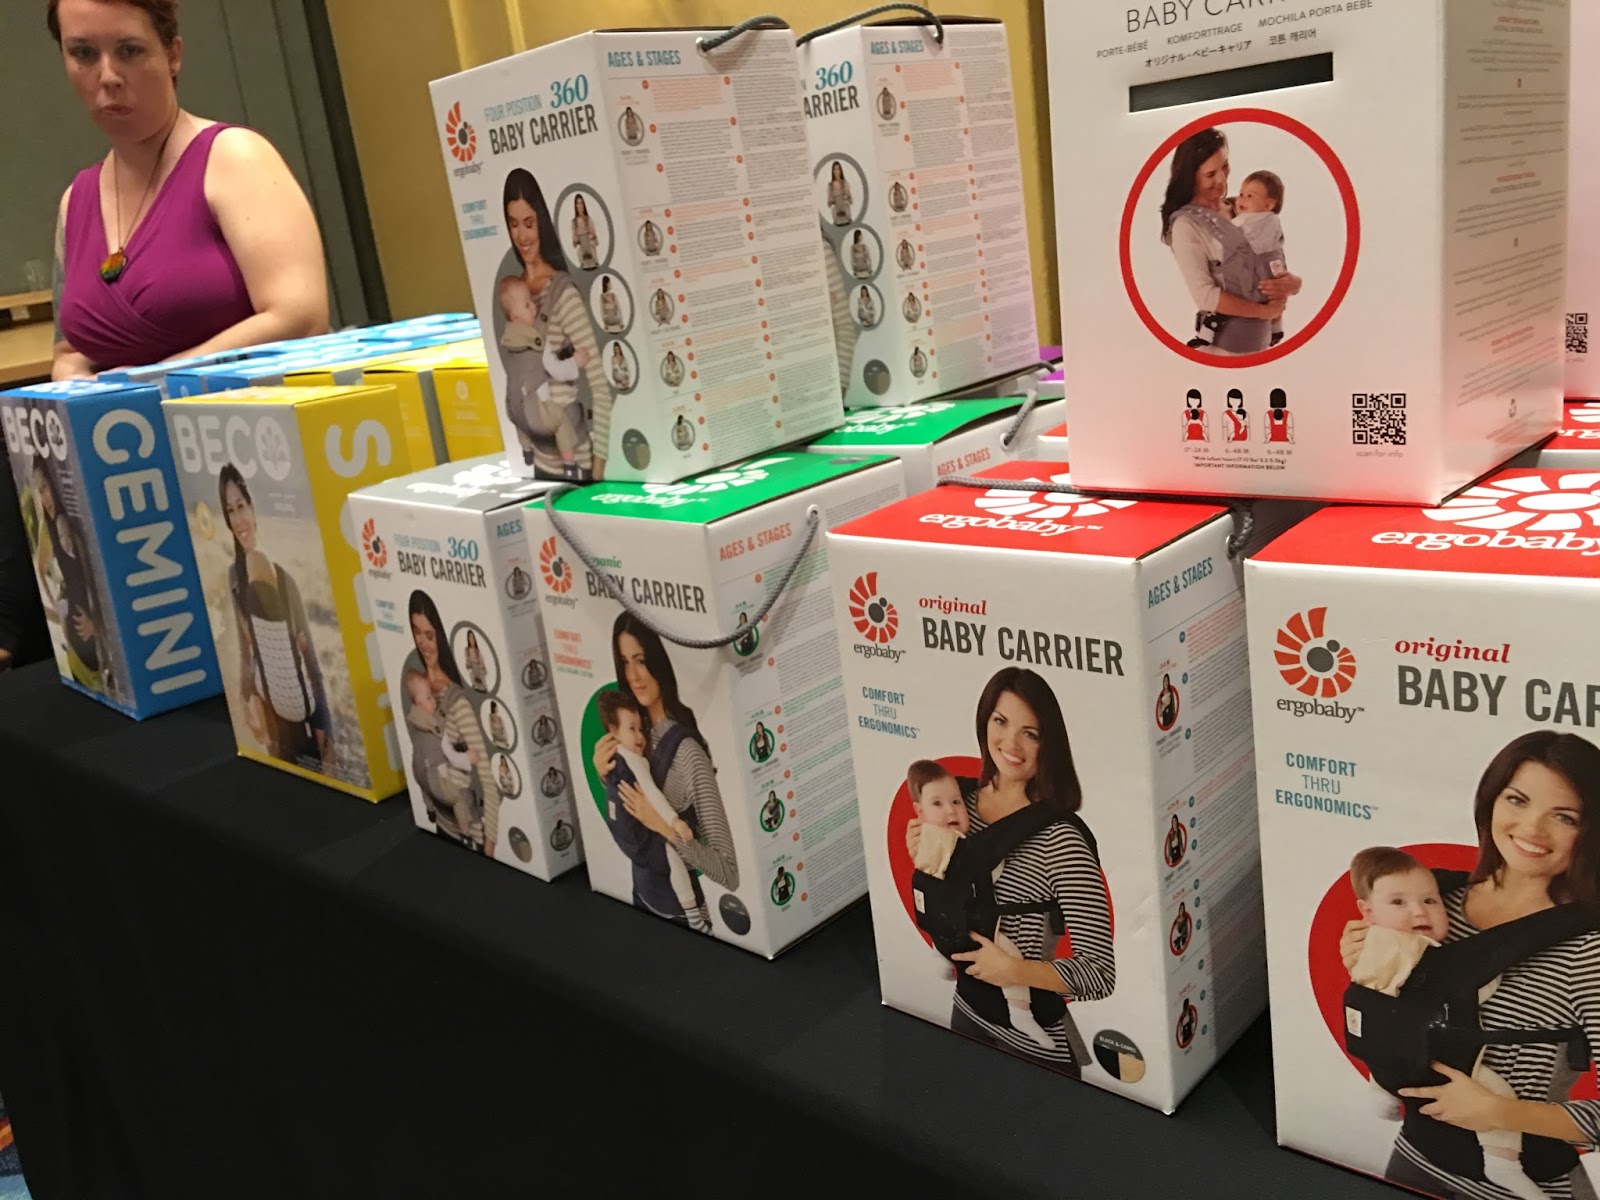
Babywearing with Ergo and Beco
Everyone walked away with one!

This one was a little more informative but mostly fun. We walked in and each company talked about the how to properly use a carrier. Although, this was specific to the carriers, they explained the physics of how the weight is distributed, which I feel applied to many carriers. They talked about how to check to see if the child in safely in any carrier. Before entering the session, you had to draw a paper that either said Beco or ErgoBaby. After the information part they, handed out the carriers. The choices where a Beco Gemini, Beco Soleil, Ergo Original, or Ergo 360. They actually had the parents who did not have a carrier take first pick. I ended up with an Ergo 360, yay! After everyone got their carrier, We played a game. I met another mom from my area, so that was pretty awesome.
Cost of session
$60
Goodie:
Ergo 360 Carrier and Chompy Chic Jewlely


The Leaky Boob with Jennifer
I love that she was so honest about her parenting/feeding experiences

This again was not what I was expecting. I wanted to know about breastfeeding. I struggled so much with my first and had to stop nursing because I just stopped producing. I was hoping on hearing about tips to help. Instead, Jessica talked about her experiences with feeding her children. First, we started with and introductory game that had us find mothers with similar experiences as us. Easier said than done! (which I think was the point) This was eye opening. After that,  Jessica started talking about Her experiences and how they were all very different and very difficult.  As a new parent that had to stop breastfeeding, I felt like a failure. I knew formula wouldn’t kill her, I just set a goal for myself and because I had to go back to work, I couldn't keep up with the pumping. I wasn’t there for my daughter. It weighed on me. Breastfeeding was hard; I thought I was an idiot because I had such a hard time…Guess what. She did too and so did most moms. As a new mother, I wish I would have known that this doesn’t just come as easily. She kept saying “I am enough” and “Fed is best.” Enough said. We are all doing the best we can and our best IS enough.
Cost:
$45
Goodie bag:
ErgoBaby Nursing pillow, nipple creams, hand pump, Ameda Breast Gel pads, Bamboobie reusable nursing pads, crocheted monkey toy, lactation tea, baby teether, voucher for a free nursing tank (can use with any bra). All in a canvas tote

After Dark with Xza Higgins 
Can you see how much fun it was?

So they had margaritas, you could request virgins. We started off with a little intro and a who had gone with sex the longest game. Ha! Then we had a woman’s physical therapist talk to us about how we can enhance our sex life and achieve better orgasms, faster. Then we just had fun talking about our awkward moments and any other sex questions we might have had. This is usually not my cup of tea, but I thought…why not? It was totally fun and I laughed so hard!
Cost: $40
Goodie bag:
EzPz bowl, a vulva shaped pillow toy, Punani Paste, Uber Lube, Lavender Sugar body scrub, feminine wipes,

MommyCon

The convention itself was a little crazy, This was the hotels fault not MommyCon. They rooms for the sleep consult were removed from everything else..weird. Parking…there wasn’t enough. In case this may happen to you get there early.  My niece was working for the convention, we had to be there early, so we got lucky. Vendors showed up late, people didn’t know where to go; it was kind of crazy for some. Hopefully next year there will be better organization, they had to change up a lot of things because the Hotel didn’t provide enough space. ( there were several other big events and another convention going on)  Next year it will be held elsewhere.
There were a lot of vendors, everyone one of them was great! There was a cloth diaper resource center where you could play and look at the many different types of cloth diapers, ask questions, and get any other info you may need.

There was a babywearing section. Here you could choose from several baby carriers and wraps and try them on, learn how to wrap. This was great!  I learned a lot.

They had play areas for the kids everywhere, they also had a art station for the kids with art supplies from Wee can To.


The seminar themselves were also really informative. They had time for Q & A’s so this was a great time to get in any questions.
Towards the end of the day I felt soooooo tired. Actually towards the middle I was done! Ha! I didn’t want to go home, but I was dead tired. So was everyone else, especially the littles.
The giveaways included: t-shirts, water, bottles, car seats (Britax, Orbit, Chicco, Clek), Diaper bags (Juju be, baby K’tan), Humidifiers, 4 moms  mamaroo and breeze, EzPz merch, breast pumps, and sooo much more!
Ticket: $35-$45 (depending if you got pre-sale or used a discount code)

(if you cannot afford a ticket, they have sponsorships you can apply for)
Goodie bag:
Kiinde starter set, Evenflo breastpads, Juju Be Be Quick, Foodie container, baby bottle, food pouch, Kind bar,

All in all, It was worth just in what I came home with. I learned bit on some topics but not as much as I would have liked, but I liked the focus of this year. Which was not matter how to choose to parent, how you feed your child, it is right for you. Next year I will probably go again and I will take more girlfriends with me. 

Next the Southern California event will be on August 20th in  Costa Mesa Will I see you there???
You can check the event calendar to see if there is a MommyCon coming near you.


Use Code: CRAZYLOVE16
for $5 off any MommyCon event ticket!!!

Bubble Painting


Now there are several ways to do this, but this is the way we chose to do for my daughter’s art party. She loved it so much we do often. It is so simple and easy to do and it is so much fun!


Here is what you will need:
Bubble solution and bubble wands or straws
Food coloring
Paper.

When I first tried it out, I used acrylic pain.  It worked alright, but the bubbles became really heavy, thick, and extremely messy. This made the bubble fall really fast and turn into globs and a stringy mess. So I decided to try and use food coloring and that worked out much better.

I used gel and liquid food coloring and both worked just as well.

The Process
  1.      .    Pour a couple drops of food coloring into the container of bubble and then I shake it up.
  2.  .. Once the foam on the bubbles settles you are ready to start creating.
  3.     You lay your paper out on a protected surface or a surface you don’t care about getting messy and start blowing bubble towards your paper.
  4.          After you start adding colors, it starts to look very neat!


So there you have it. Bubble painting. 

Ice Cream in a Can (or bag)

This was by far Kaitlyn’s favorite summer activity. We made ice cream in a #10 you can and even use a big ziplock bag. It was so easy and so much fun!
What you need:
  • A gallon size Freezer bag or a #10 can
  • 2 sandwich bags
  • Lot’s of ice
  • Rock salt or just plain old table salt
  • Half & half or Milk
  • Vanilla
  • Sugar
  • Spoon  and toppings if you want


Recipe
  • 1 cup  Half and half or Milk
  • 1 tsp vanilla
  • 2 tablespoons of sugar

The process


  1. Start by adding about 3 cups of ice and 1 cup of salt to the #10 can or your Ziplock bag.
  2. Next stuff one sandwich bag into another
  3. Add half and half, sugar, and vanilla into the bag and seal
  4. Put the sealed bags into the larger container and either start shaking it. If you are using a #10 can make sure there are no sharp edges on the inside. With the can you can kick the can around. Kaitlyn had fun with that part!

 
Long dead grass --> drought and day before cutting grass...ah well
If you  are using a bag you can easily feel and see when the cream starts to solidify, once you reach the desired consistency you are ready to enjoy.

With the can you’ll obviously have to open it up and check, but again Kaitlyn had fun checking on her ice cream.


There you have easy peasy yummy ice cream. 


DIY Dipped Table Runners


My daughter has been asking me for a paint party with all the colors. She is so excited helping me plan all the details. So we decided table runners in different colors would be cute...So here they are


You'll need:
  • Fabric preferably 100% Cotton (I used 2.5 yards for 6 runners)
  • Tie-Dye kit OR RIT Dye in color (s) of choice.
  • Scissor or Rotary blade
  • Straight Edge (unless you can straight lines one your own...)
  • plastic or glass container
If NOT using a Tie-Dye Kit
  • rubber bands
  • gloves (totally optional...)
(These items came with my kit)

THE PROCESS
  1. Cut Fabric into 2 long strips, no measuring necessary. Leave the fold in your fabric as it came off the bolt and cut the 2.5 yards of fabric in half at the width. You should now have 2 long strips of fabric.


2. Take one of the strips you cut in Step 1 and fold it into thirds vertically. Make a small slit mark at the fold. The easiest way for me to cut the long piece into thirds, was to first unfold the fabric after making the slit mark. Refold horizontally and cut at the slits using your straight edge and rotary blade or scissors. In the picture below I placed the ruler where the slit mark was. Hopefully that made a little sense. You should now have 3 runners. Repeat with the second strip of fabric to end up with 6 runners.  
 
Here is what the runner looks like after 

3. Roll them up like a taco and secure with a rubber band. 

4. Mix your dye according to packaging directions. My directions were as simple as filling the bottles with water and shaking.
5If you haven’t already, pour your dye into the container of your choice. Make sure it is small enough to give you at least an inch of dye to dip into.
6Dip one end of the fabric in and watch it soak up the dye!
7. Hold it there for a few minutes... then repeat on the other end. 
Don't you just love my assistant...I DO!
8. Remove from Dye, allow to sit a few minutes before laying it out.  This is what makes it less likely to get unwanted spots when unrolling...a lesson I learned the hard way....
9. Unroll let dry, If you have a heat gun you can speed up the process and also help set the color. 
10. Repeat with each color. I needed Orange, Yellow, Lime, Turquoise, Pink and Purple. As you can see there is no purple in my kit. I just mixed the Pink and Turquoise to get purple.

****If you want and ombre effect, there are two things you can do....
  • Use RIT dye! The RIT dye gives that effect on its own….You’re good!
  • If using a Tie-Dye kit, start with a very shallow puddle of dye, dip one end....then the other....then add a little water and dip again until you reach your desired level of ombré. 


Yumbox Review


For a while, a long while, I struggled with getting my 2 year old to eat her lunch. It seemed she was always eating, but never finished her lunch. Another problem I ran into was the nuance of packing lunch in a few different containers each day. Sometimes parts of her meal wouldn't even be touched. She is very young so I wanted something she could manipulate all on her own. That is when I came across the Yumbox.

Since introducing this to Kait she has done much better with finishing her lunch. I have really come to love this product, not only for my daughter but for myself as well. It has also been my go to gift for my family.


Here is what I like about the Yumbox: Both the Original 6 Compartment and the Panino
  • They are absolutely leak proof. In order to avoid any spills it is very important not to overfill the compartments. If you have to force the lid closed, chances are there is going to be a leak. Additionally, these are not designed for true liquids like milk, yogurt drinks, etc. It works with applesauce, ranch, yogurt, etc. 
  • It is very easy to open and close. My two year old can use her Yumbox with ease. 
  • The material it is made of is very durable and also very light weight. 
  • The box itself isn't huge, especially when taking into consideration all the food that it acutally holds. 
  • The inner tray is removable. 
  • It is TOP RACK dishwasher safe. It is advised that you take the outer box out before the heat cycle. I take both out before the heat cycle.
  • They are BPA Free, Phthalate Free and FDA compliant. 
  • It makes it easy for children to become involved in packing their own lunch.
There are a few differences between the Original 6 Compartment Tray and the Panino.


  • The major difference between the two styles is the actual configuration.
  • The 6 Compartment tray has 5 areas that hold 1/2 cup each and very teeny area that is designed for dip or sweet treats VS the Panino that has a large area that holds 2 cups,  2 smaller areas that hold 1/2 cup and a well that can hold up to 1oz. 
    • The trays are designed a little differently as well. If you look at the bottom of the trays you will find that the Panino has a smooth bottom, while the Original does not. What does this mean? It means that the areas in the Panino are a little deeper than the Original and also water doesn't get pooled in the tray. Look at the picture below to see what I mean.  


    What I don't really like. 
    • The box can be a bit big for some lunch bags. Both of the lunch bags basically fit the the same contents with the exception of the Thermo cup. In the second lunch bag, the Thermo cup was replaced by a juice box. Contents include: Yumbox, Ice pack, Utensils, snack bag, beverage and wipes. I pictured how I fit it all in the bag. 


    • Another thing to keep in mind is that the Original is a perfect size for a younger child but may still leave an older child or adult feeling hungry. I, however, use the Panino almost every day and I have never left hungry!
    • I also really don't like how water pools at the bottom of the tray in the Original Yumbox. It can make is hard to dry. 
    • One last thing, there is a little spot in the Original that seems to be just dead space. I would like to see this space used.

    ****One other thing I must mention. Although both boxes are configured differently, they are the exact same size (8.5 in x 6.5 in x 1.8 in). Both trays can fit into each others cases, but the seals don't line up. This means they will NOT be leak proof and you run the risk of damaging the seals.
    Notice how the seals are totally different.

    Here is a fun little experiment I conducted. I filled each compartment with different extra runny liquids. I shook it up and put them on their side for about and hour. I used a yogurt drink, milk, soy sauce, oil, hot sauce and water with food coloring. Here is the result. 


    This is how we started. 
     I ended up adding food coloring to the milk and changing the water from orange to purple, but I forgot to take a picture, whoops!

    Anyway, mostly everything stayed put. The spill over we see is actually what dripped when I opened the lid.

    The real test was putting it up on it's side. The milk leaked VERY slowly. The water ran into the yogurt drink, and the oil ran into the water. Oddly enough, the soy sauce and hot sauce stayed put. All in all, I am thoroughly impressed.


    Disclaimer: These are my true honest opinions, I have recieved no compensation for writing this post.


    Bare with me!

    I am sorry for the wait....I am planning on going live Early April! For now I am transferring and revising posts from my previous private blog.

    Thank you All for the support!!!!

    Authentic Salsa Verde


    This is seriously the easiest salsa ever! This is a must have in our home. At any given time of the week we have fresh homemade salsa. Whether it’s Salsa Verde, Salsa Roja, Guacatillo, …etc. We always have something! So, without further ado here we go:

    Ingredients:
    • 10 medium tomatillos (green tomatoes)
    • ½ bushel of cilantro
    • 1/8 of an onion
    • 1 clove of garlic
    • 1-3 serrano peppers
    • 2 teaspoons salt or to taste
    There are few different ways to do this…here is my favorite:
    Peel and wash the tomatillos
    Wash the cilantro and serrano peppers

    1. Place the tomatillos, cilantro, onion, garlic, and serrano peppers in a saucepan
    2.Add enough water to the saucepan to cover the ingredients.
     Note: Boiling only the tomatillos and serrano peppers will produce yummy results as well.


    3.Boil until the tomatillos become soft and translucent.

    4.Drain and put in blender while it is still hot

    5.Add salt (unfortunately green salsa requires quite a bit of it)
    6.Blend until you reach the desired consistency

    You are now done and ready to SERVE and ENJOY!!!

    Disneyland with the Entire Family


    I will try to do the best I can with remembering the order of events but in this entire week is a bit of a blur. We went to Disneyland, the beach, the zoo, and Sea World! Wowza!

     A little while ago I went to Disneyland with my family. It was loads of fun. There were a few things that we came across that we didn't think of until we got there. One was how to keep everyone happy and make it a good fun time for EVERYONE. There were 4 adults and 5 kids ages 2,4,6,11, and 12. The trip was a success. Here are some things that worked for us and some things that didn't.

    I was worried that the younger kids would get restless and cranky waiting in the lines. So I took some entertainment--bubbles! 

    Boy or boy there the bubbles a hit. I took 2 dollar store containers of bubbles but we had to end up having all the kids take turns. Even the older ones were entertained by the bubbles. The nearby kids really appreciated the bubbles, one crying baby in front of us was so distracted by the bubbles he forgot what all the fuss was about.

    A Spritz bottle was another surprise hit.  I took a teeny 2 oz. spritz bottle to help keep the kids cool if it got too warm. The older two had a blast spritzing each other and staying fresh, my young 3 took turns watering the plants making and faces on the concrete. We of course had to refill the 1 I took at the park fountains.

    Take plenty of snacks and water. Disneyland no longer refills the souvenir cups. You can purchase them, but you cannot get the refills anymore.

    Take or rent a fold-able stroller. The three younger kids all ended up taking turns in it, Their poor feet were so tired, but they did NOT want to go home.  I few other things I packed where, extra warmer clothes, socks, snacks, w 

    We wanted everyone to have a great time without splitting up too much and without only doing the “baby rides” or only doing the “big rides.” Here is what we did…

    Get your fastpasses for the rides you can. Disneyland also has a parent swap. This is exactly what is sounds like. A group goes into the ride while another stays out with the kids. Those that go in first will get a ticket with a timestamp on it. You then come out, give the next group the pass and going and get on the ride. In some rides, like the Indiana Jones ride there still about a 15-20 minute wait between rides. Some are instant, it just depends on the ride. Make sure to ask your Cast member for specific details.

    When we first got there out littles were wide awake and so we decided to start the day in the “baby rides,” the compromise was that older ones got to choose which ones we’d ride. *My daughter was deathly afraid of the Pinocchio and Snow White rides, they were a little too doom and gloom for her tastes…just FYI* Then we did some of the in between rides that are fun but basically anyone can ride, like the Dumbo ride, after that my daughter fell asleep. TAKE ADVANTAGE OF NAP TIME! This is when we high tailed it to the some of the big rides.  The 4 and 6 year old were tall enough for most of the big rides with the exception of Indiana Jones. I can’t remember what order we went in. 

    After my daughter woke up it was lunch time. We all took minute to eat. Then we continued with it's a small world.  The day pretty much went like this, There was a but when we actually did Indiana Jones, the two younger one couldn't ride, so I went into the tree house there with them and that took up most of our wait time. Then while the next group waited for us they took the little one to the Winnie the Pooh ride and character meet. After we were done we met up there and continued the adventure. At the end of the evening we went to California Adventure Park. By this time my daughter fell back asleep. She was done for the night. So the rest of the night was devoted to getting the rest of the "big rides."  That was really our night. 


    DIY: Stain Resistant Fabric Seat Covers


    Let's face it. Our seats need a little updating every once in a while, but the super cute fabrics are just not practical for the dinning table. I decided I wanted to make my own stain resistant seat covers. I looked and looked and the furthest I got was a tutorial on making a floor rug out of a tablecloth....I applied this principle to the seat covers here is what you will need.

    • Fabric of your choice, I used a patterned duck cloth 
    • Paint roller and tray ( I would suggest the mini ones) or paint brush
    • 1 quart of polyurethane, semi-gloss or satin finish 


    Ok,  I am going to suggest you something a little differently than I did.

    1. Find and clean a nice piece of concrete to work on...

    2.. Pre-cut your fabirc to the size you will need. If your reupholstering a seat, then I would suggest measuring the area of the top including the depth of the seat and add an inch....I really just eyeballed it.

    3. Shake your can of Polyurethane and pour into the paint tray
    4. "Paint the middle area of the fabric leaving about an inch or two untouched around the perimeter.
            * this makes it easy to wrap the fabric around a seat and easy to staple.
    5. Wait for it to dry. Make sure to peel the fabric off the concrete a few minutes into drying, this just ensures it doesn't really stick to the concrete or work surface.
    7. Then apply a second coat. Peel up the fabric so it doesn't stick.
    6. Move onto your project.

    Note: I used this cloth to update my dining room chairs. The polyurethane makes the cloth a little stiff at first that can make reupholstering the seats a little difficult. On my last half of the project, I pre-cut the fabric and worked in smaller pieces.


    Using this method you can make a nice economical outdoor or indoor floor cloth. Just cover the entire piece of cloth and coat both the top and the bottom of the fabric. Oblong table clothes are perfect for this.


    Top 10 Toddler Must Haves


    1. Thermos Funtainer Sippy Cup-What can I say? I don’t go anywhere without this. My daughter drinks a lot of water and this is relatively spill proof. My favorite thing about this is that it actually keeps her water or smoothies cold for hours. She can open and close the lid on her own. It has a little pop-up handle that she can carry it by. The only real con is that it spills if it tips over and the lid is not closed. Without the lid, it is NOT spill proof. Although Foogo makes a spouted version that is always spill proof, I prefer the straw because I can throw it in my purse and not have to worry about the mouth piece touching everything. 
    2.  Yumbox Lunch Box-This puppy has totally changed mealtime for us. My daughter is more of a grazer and she loves variety. The 6 compartment tray offers enough spaces for a good healthy variety. She especially loves to pick what goes in it. Her little hands can easily open and close this leak proof lunch box. Click here for a complete review.
    3. SoYoung Toddler Backpack and Matching Lunch Bag-These are just too darn cute! I love the style and durability. These are PVC, Phthalate, and BPA Free. The inside of both can easily be wiped down. Having her own backpack for "school" has really encouraged her to take the initiative in packing her own bag, I of course help! She loves having her own little backpack for trips. ***The 2015 styles are a little more spacious and easier to handle than previous years.
    4. Mutsy Grow Up Booster-I had the Fisher-Price Spacesaver Seat, which I loved, but I was tired of having that eye sore in my home. It was also really annoying that the seat never pushed under the table. Thus, began the search for a comfortable booster seat that would fit under the table, would strap to the chair, and had a lap belt. That’s when I can across Mutsy Booster. It had all of the above, plus it looked good and matched my décor. There are a few different colors available. I’m sure you can find something that will coordinate well.
    5. The Honest Company Hand Sanitizer- Any hand sanitizer will do, but I have a fondness for spray sanitizer, mainly this one. It doesn’t dry out your hands. Ff your hands are already dry, you can use this without irritating your already dry skin. I like it for Kait because it doesn’t get everywhere and it’s gentle. You can also pick it up at Target and Buy Buy Baby. If there is a BBB near you, you can actually use either Buy Buy Baby or Bed Bath and Beyond coupons toward these purchases. 
    6. The Honest Company Bubble Bath-These are seriously the bubbliest most long lasting bath bubbles ever and they smell so good. Burt’s Bees Bubbles are a very close second to Honest Company's. Both are gentle on the skin. 
    7.   Itzy Ritzy Snack Happens Bags- These are my “everything” bags. I do have dedicated snack bags and everyday use bags. I have used them to hold little first-aid kits, pacifiers, berries, crackers, you name it. They are extremely sturdy and washable. Trust me on this one, they are great!
    8. Oxo Sippy Cup Cleaning Tool Set and BottleBrushReally any bottle brush, I just like the stand for this one. I will probably always own a bottle brush. There are quite a few cups I can’t get my hand into and this surely comes in handy. The tool kit is a must have in any kitchen whether you have a sippy cup or not. There is a pick that is great for getting things out of small holes or from under seals. The other two brushes in the set are for cleaning straws and other hard to get into places.
    9. Infantino Fresh Squeezed Station- I find that having this around makes it way more economical to have convenient and healthy snacks ready. I have packed yogurt, fruit purees, juices, and smoothies. I think I even put Jell-O in a pouch once! The caps are large and won't be a choking hazard for younger children. They are also clear and can be easily labeled.  This little station makes filling the pouches virtually mess free and fast! The refill pouches come in a pack of 50 for about $12.
    10. Gerber Silicone Place Mat -I always have this in my purse; you never know when you might need it. What I like about this silicone place mat over others is that it has a small lip around the edge. It has saved us from a spill a time or two. The material sticks to the surface it is on so that it doesn’t slip around or move at all. I also have a spare to do arts and crafts on. I especially like that they don’t require a ton of storage space. The only down side is that the material attracts lint. I just carry it around in an Itzy Ritzy snack bag and voila, problem solved! 

    Picnic Treasure Hunt

    Now that we are heading into perfect picnic whether, why not turn a typical picnic into a treasure hunting adventure? That's just what we did! We picked up a dinosaur fossil kit. One of us went a little ahead an buried the Dinosaur fossils and put the map in the bushes. Here is how our little adventure went. 


    Is that a treasure map?
    Yes it is!
     Go here to get or make your own.
    After we ate lunch we looked into the bushes and there was something there...We walked over and Gavin couldn't believe his eyes! It was a treasure map!!!!

    We followed the map...
    First to a bush..then to the swings

    then down the slide

    then to the "sandbox"

    AND THEN...we found the X

    He dug...
    and found
    Bones?! A Dinosaur!!!!
    Here it is all put together!

    It was a fun, fun, day with my sister and her son (my gorgeous "big" man) Gavin!

    What are you waiting for? GO! print out your treasure map and find the buried treasure!

    ~Jacky